In January 2010, I planted, on the advice of my nursery-man, four little sticks. In the intervening year and a half, I’ve learned a reasonable amount about said little sticks, and I’m going to share it now. (: I am pretty sure that ‘long around September I’m going to have an addendum to this post as I try to figure out what needs whacking back. But before I launch into the lecture, let me muse for a few minutes.
I’m a native Californian. I grew up less than two hours from Knott’s Berry Farm. If you’ve ever been to Knott’s, you’ve heard the story about how Walter Knott found the last few vines in an abandoned field once owned by Rudolph Boysen, and how he turned those nearly-dead hybrid raspberry-loganberry-blackberry vines into history, fame, and delicious jam. Maybe you’ve had the chicken, biscuits, and boysenberry pie at Knott’s Berry Farm. For me, that’s a childhood memory that made a lifelong imprint. But it wasn’t until I was older — and when I started growing my own food — that I began to wonder why it was that in California, the birthplace of the boysenberry, our very own special native fruit — I couldn’t find them in the grocery store, except as jam.
So I decided I’d grow them myself. And I did.
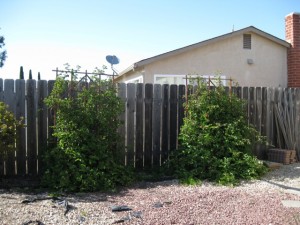
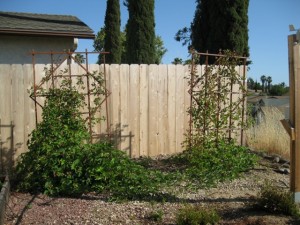
First thing I’ve learned: boysenberries love my lousy Mira Mesa clay soil, full of rocks, minerals, and under-the-surface retained water. Those four little sticks have grown into this:
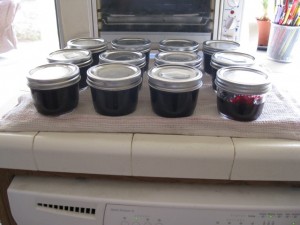
Second thing I’ve learned: you really, really really don’t need four boysenberry plants for a family of two. {: Unless you love them even more than I do. I have so far in the past week made boysenberry cobbler, boysenberry pie, and have boysenberry jam cooling in jars right now.
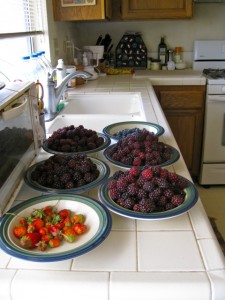
I picked berries on Friday. I picked them again this morning. This is what I picked this morning:
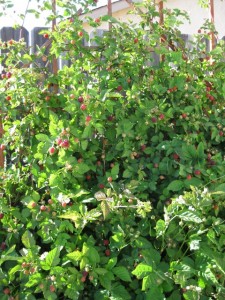
That there is four and a half pounds of boysenberries. And you can see in this picture that the plants are nowhere near done.
They do pretty much grow, flower, and fruit all at once, it seems — one gigantic harvest a year. I’ll try to make sure that I post when they are done, so that I have a record of how long they produce.
Third thing I’ve learned: bees adore boysenberries. Plant them and the bees will be all over your pretty white flowers, buzzing away happily. They like the boysenberries better than my lavender!
Fourth thing I’ve learned: unless you’re way better at trellising than me (certainly likely!), pick from the bottom up. That way you don’t step on ripe berries when you’re going for the ones in the middle and at the top.
Fifth thing I’ve learned: Just because the plant is “thornless” doesn’t mean it doesn’t have thorns at all (these have little tiny ones that are just a nuisance, rather than painful), and just because it’s thornless to begin with doesn’t mean the new canes will be thornless too. Obviously these are adapting very, very well to my yard!
Sixth thing: I know why you never see boysenberries in the grocery store. I know you might find them in the farmer’s market, but it’s 99.99% that you won’t find them in the grocery store, because a boysenberry goes from underripe to overripe in, oh, about three days. They may have cores like blackberries, but they’re soft as the raspberries they were cross-bred with. Pick a bowl of fresh ones like those in the picture above, and the almost-overripe ones will squish from the weight of the other berries. Freshly-picked perfectly ripe or just-barely-underripe boysenberries last about two days in the fridge. That’s it. You want ’em raw, better grow ’em yourself, or find someone who’s growing them and maybe they’ll share. (;
Seventh thing: boysenberries are terrific raw — slightly underripe, they’re much like raspberries. Closer to overripe, they’re more like blackberries. Either way, they have a honey-sweet tang all their own. But great as they are raw, they’re even better cooked. Cooking naturally mellows and melds the flavors in the berries into one cohesive taste of pure awesome — as if every point of flavor you could taste separately raw are all together at once when they’re cooked.
You can use boysenberries pretty much anywhere you’d use their cousins, but sometimes the simplest way is the best.
Pure Knott’s Nostalgia Boysenberry Jam
Makes about 11 half-pints, or 5-6 pints.
- 4 1/2 lb. boysenberries, freshly picked, well rinsed, and cleaned of any remaining caps and leaves (have a mix of mostly ripe and some slightly under-ripe so they’ll set better)
- 6 1/2 c. sugar (I like evaporated cane sugar, which still has a little cane flavor)
- 2 Tbsp. lemon juice
Set up your boiling water-bath canner, jars, and lids.
Place all of the berries in a large pot and crush them gently. You can use a potato masher if you have one. I don’t, so I use a pastry cutter. You can also use the back of a big metal spoon. Just remember that boysenberry juice, like its cousins, stains like crazy. Wear an apron when you do this.
Add the sugar and the lemon juice and stir well. Bring the berries to a boil, making sure all the sugar is dissolved. Reduce the heat so that it boils gently, and cook the mixture, stirring occasionally, until it sheets off a metal spoon.
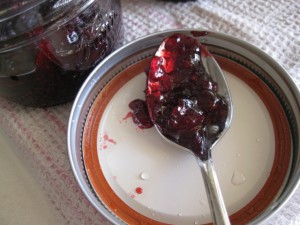
I like mine softly-gelled. So I check the big metal spoon I stir with, after I take a break from stirring for a while, before I put it back in the pot. If the jam has gelled on the spoon between now and the last time I stirred, that means it’s pretty much done. It took me about half an hour to get to a good gel.
Ladle hot jam into hot jars, wipe the rims, screw the lids on finger-tip tight, return the jars to the canner, bring to a rolling boil, and process in the boiling-water canner for 10 minutes for either pints or half-pints.
Hello,
I have been harvesting and freezing all of my boysenberries this season for a day when I can make a massive amount of jam. Should I just leave them out to thaw first or try this with them frozen, mashing as they thaw in the pot?
Thank you!
I apologize for such a late reply! I think you can get away with mashing them in the pot as they thaw.