One of the things I learned in culinary school was a very basic thing: how to hold and use a chef’s knife. I think it’s key for anyone who wants to have fun in the kitchen to master this very simple thing. Using a larger knife makes larger jobs easier. It’s much faster and neater to slice and dice your way through a pile of onions or tomatoes with the right tool.
Everyone has their own personal preferences with a knife. It’s worth your while to take your time and try them out. While a big price tag doesn’t always indicate a great knife, one of the things that’s true is that there’s usually a reason cheap knives are cheap. They’re designed for people who don’t know what they’re doing, or how to hold one properly. I avoid Cutco knives  because their handles are specifically designed for people to use an incorrect hammer grip instead of a correct pinch grip.
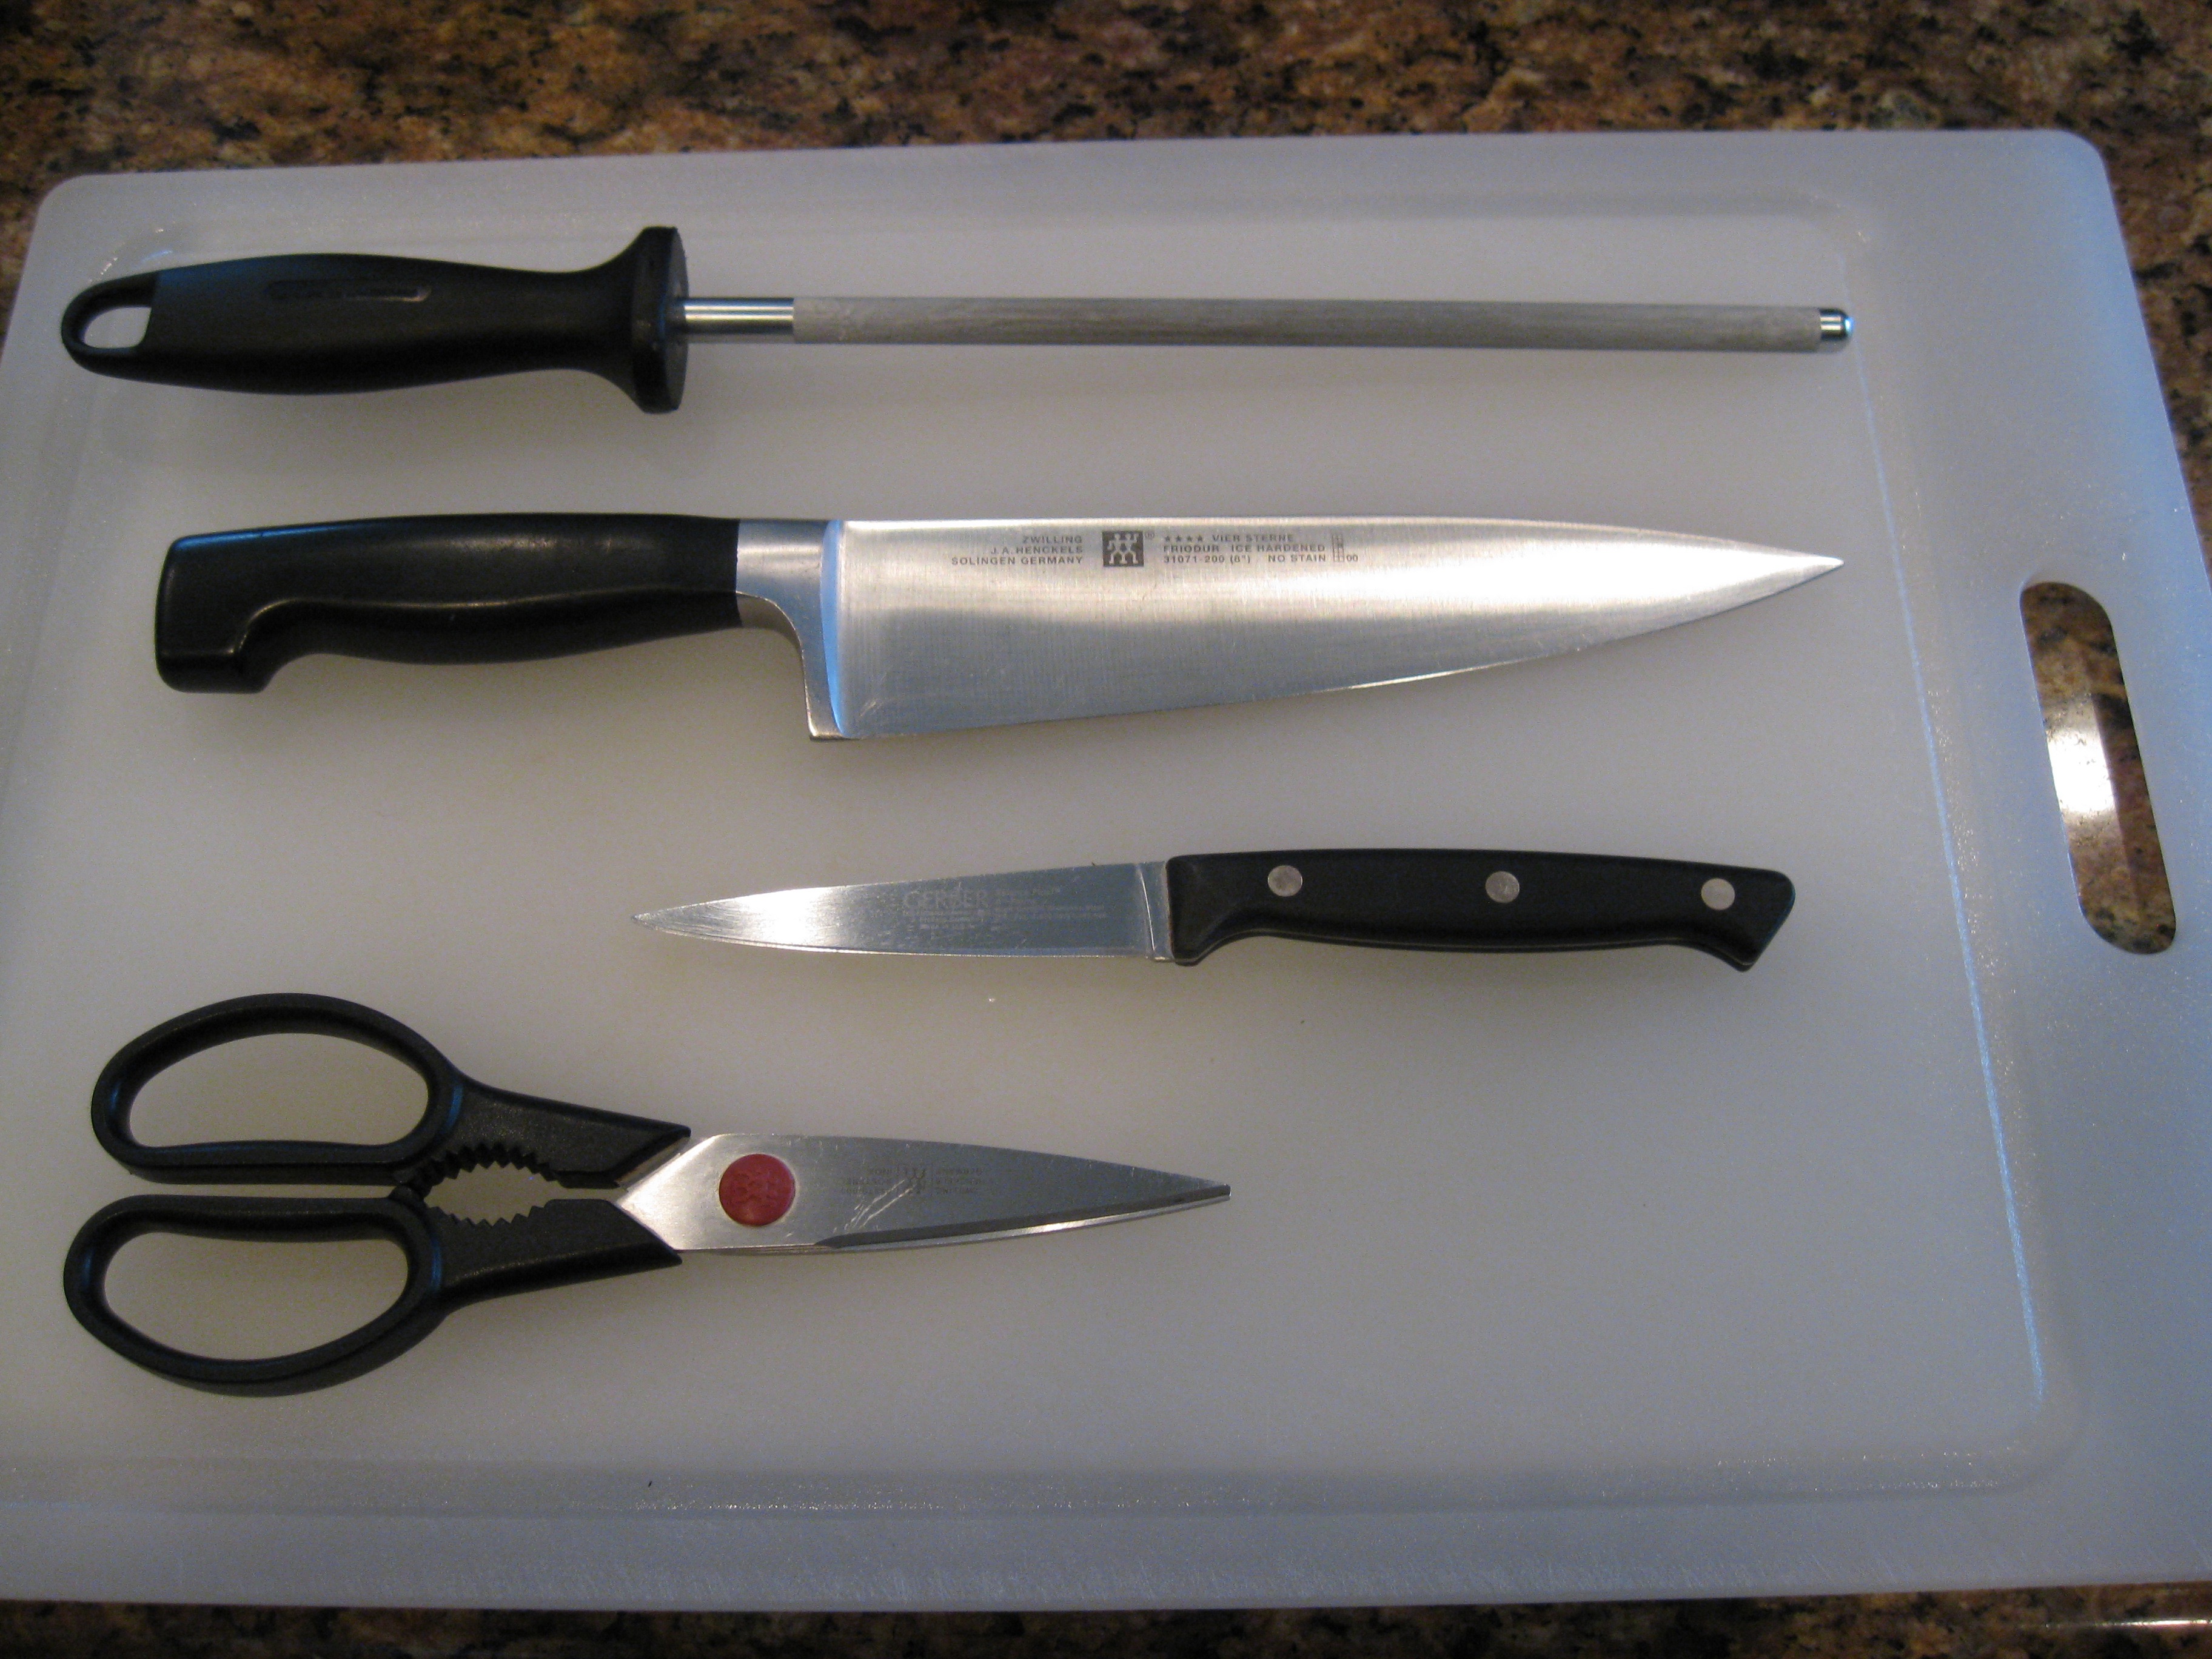
You don’t necessarily have to pay a lot for a knife if you know what you’re looking for. You can find surprisingly good knives in thrift stores. Speaking of which, let’s take a look at the picture below:
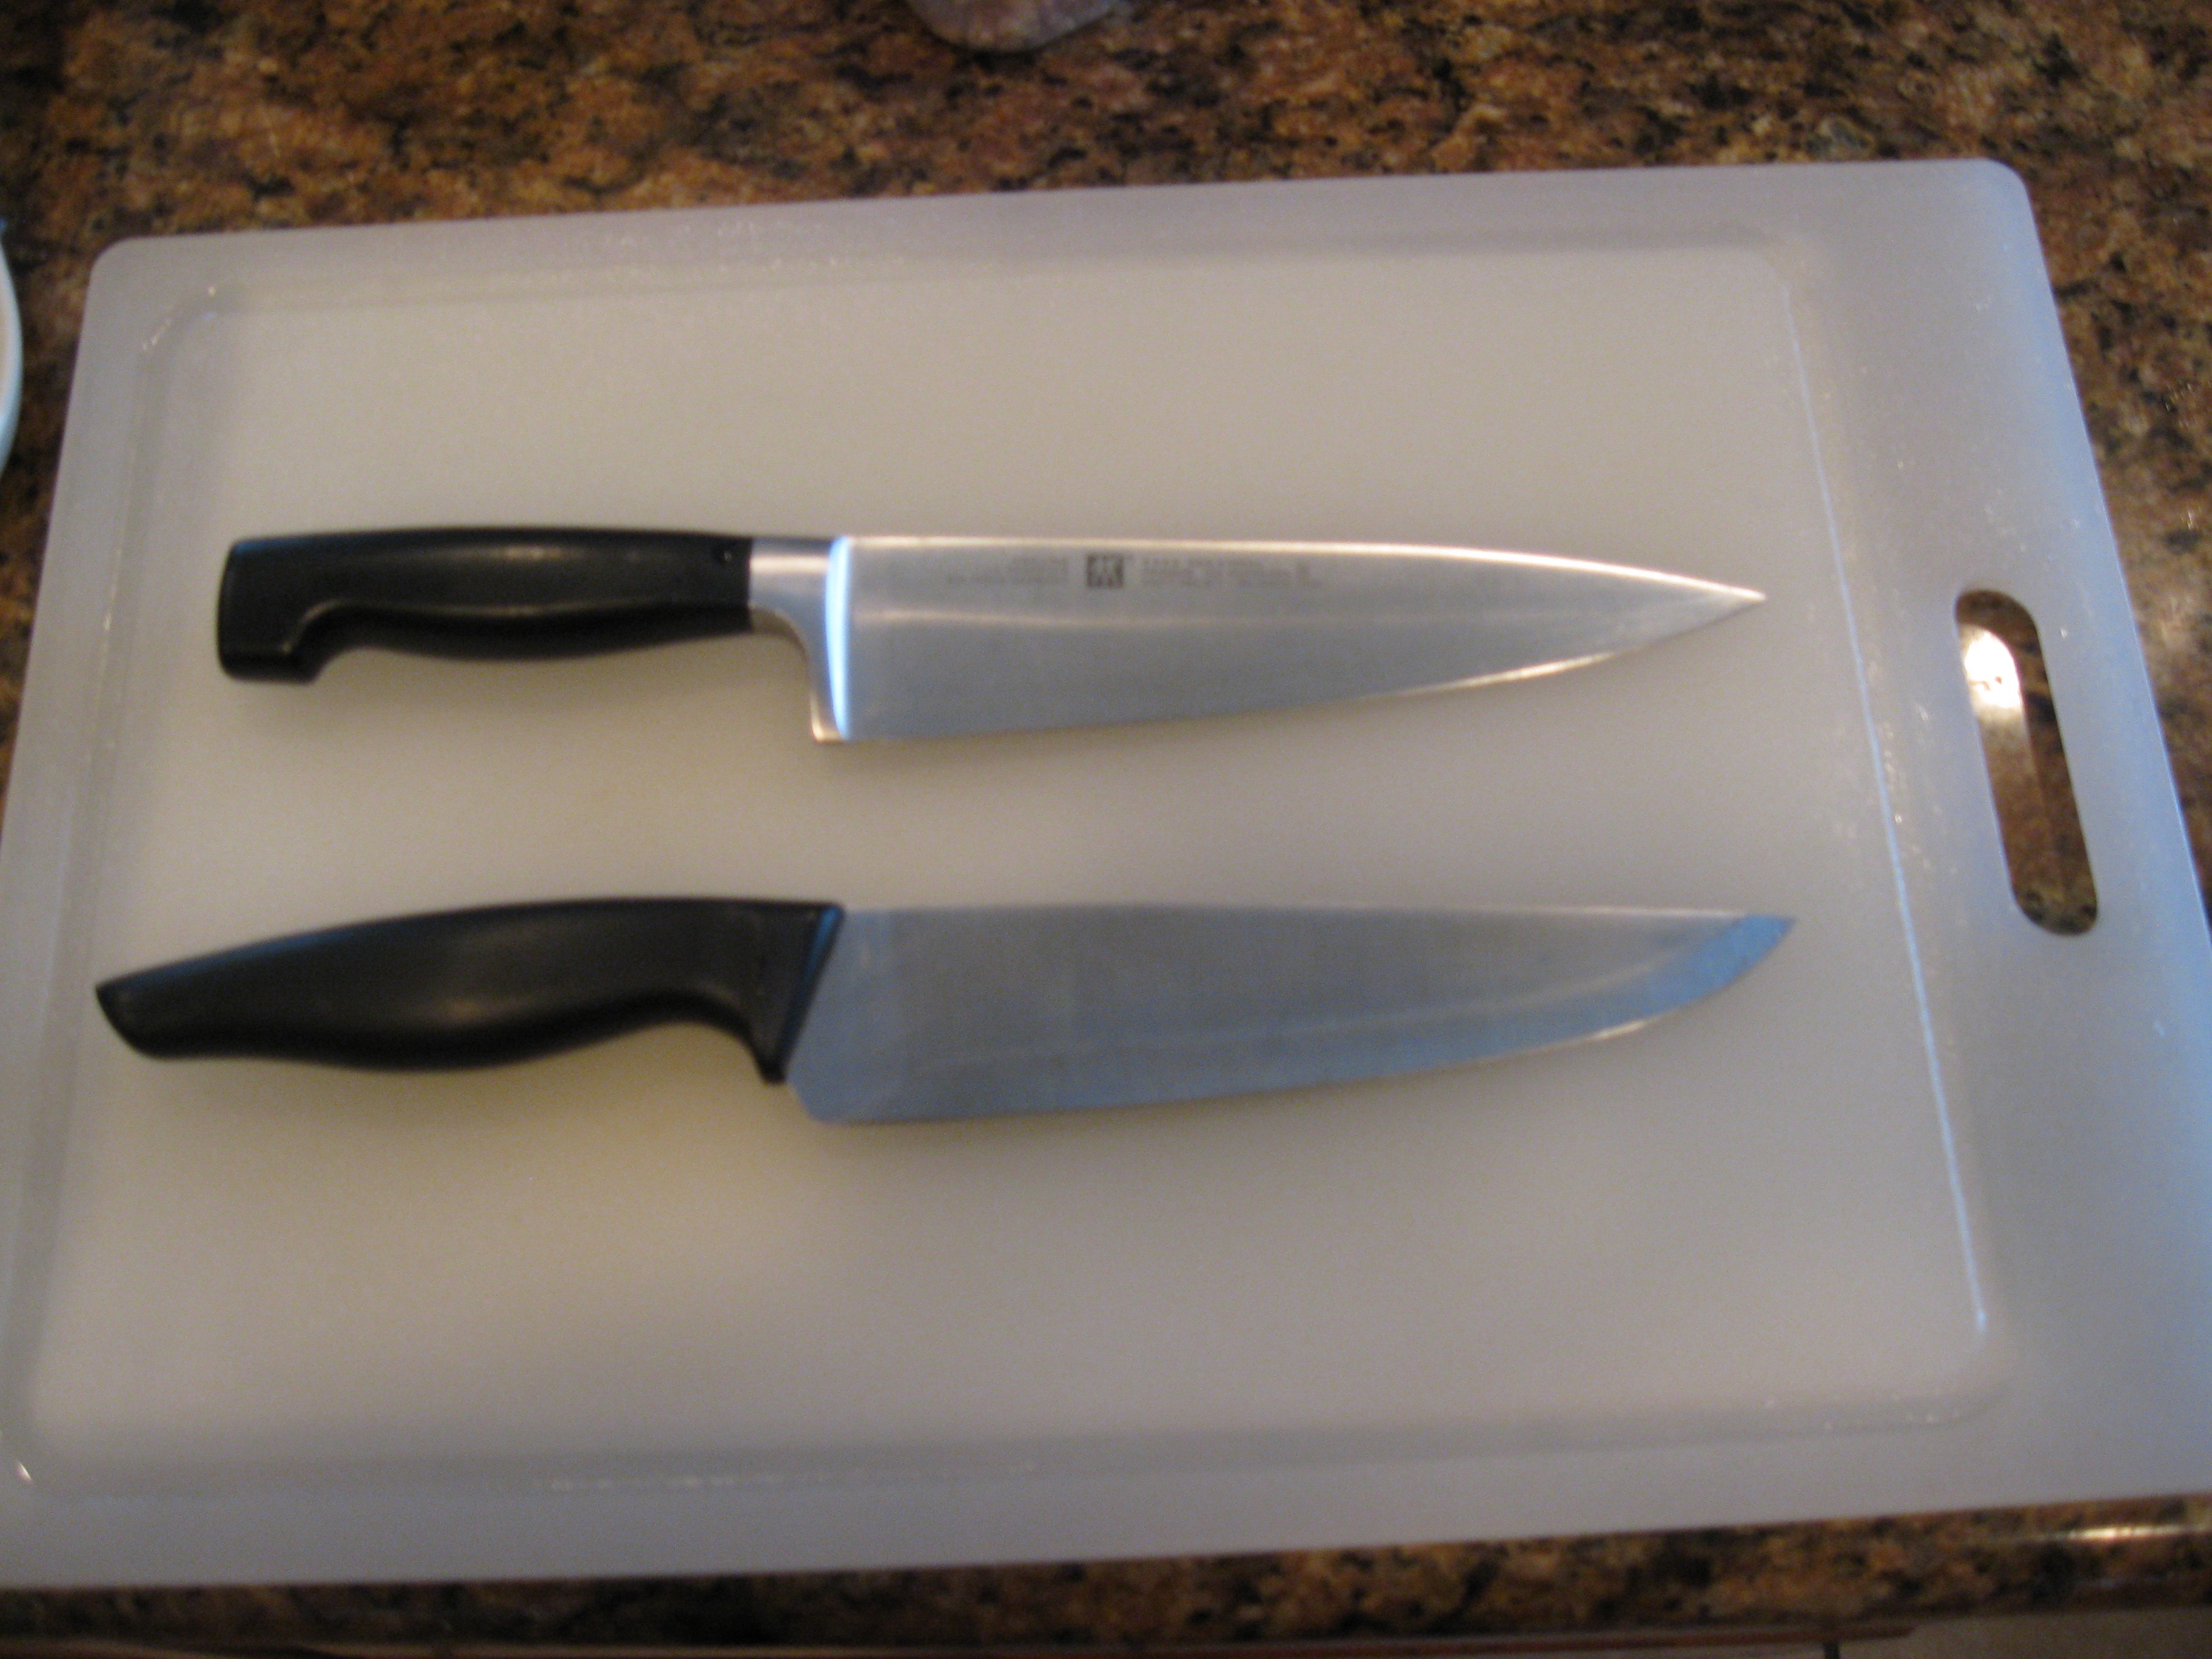
Two different chefs’ knives
So the knife on top is a Henckels, which I got as a wedding present -mumble- years ago. The knife on the bottom is a Martha Stewart Everyday, which I picked up at the aforementioned thrift store for $2 last week, for the purpose of writing this post. We could get into details about how a knife is ground and made, but other people have said those things better than I could, and I don’t think that’s essential for a beginner. What I do think is essential to talk about is the shape of the blade.
You’ll see that the Henckels knife has a straighter, flatter blade. The Martha knife curves upward more towards the point. This makes a small but significant difference in the size of item you can cut more easily. The longer and flatter your blade is, the more of it you can apply at a single time and to a larger item. The Martha blade will rock more easily if you’re chopping herbs, but it’s fiddly to do finer work like coring tomatoes with its point.
The handle on the Martha knife is also substantially longer, though it does have a nice comfortable bolster, which not all inexpensive knives do. (The bolster is where the blade meets the handle.) We’ll get into the utility of a comfortable bolster in a minute. The point I want to make about the length of the handle is that for smaller people like myself, a long handle can get in the way of chopping. It makes the lever action of the chop longer, and can rise up into your arm on your downstroke. I wouldn’t always say smaller is better when it comes to handle length, but comfort is a must. Try before you buy, if you can.
Now, let’s talk about the breadth of the blade and the bolster, like I mentioned before.
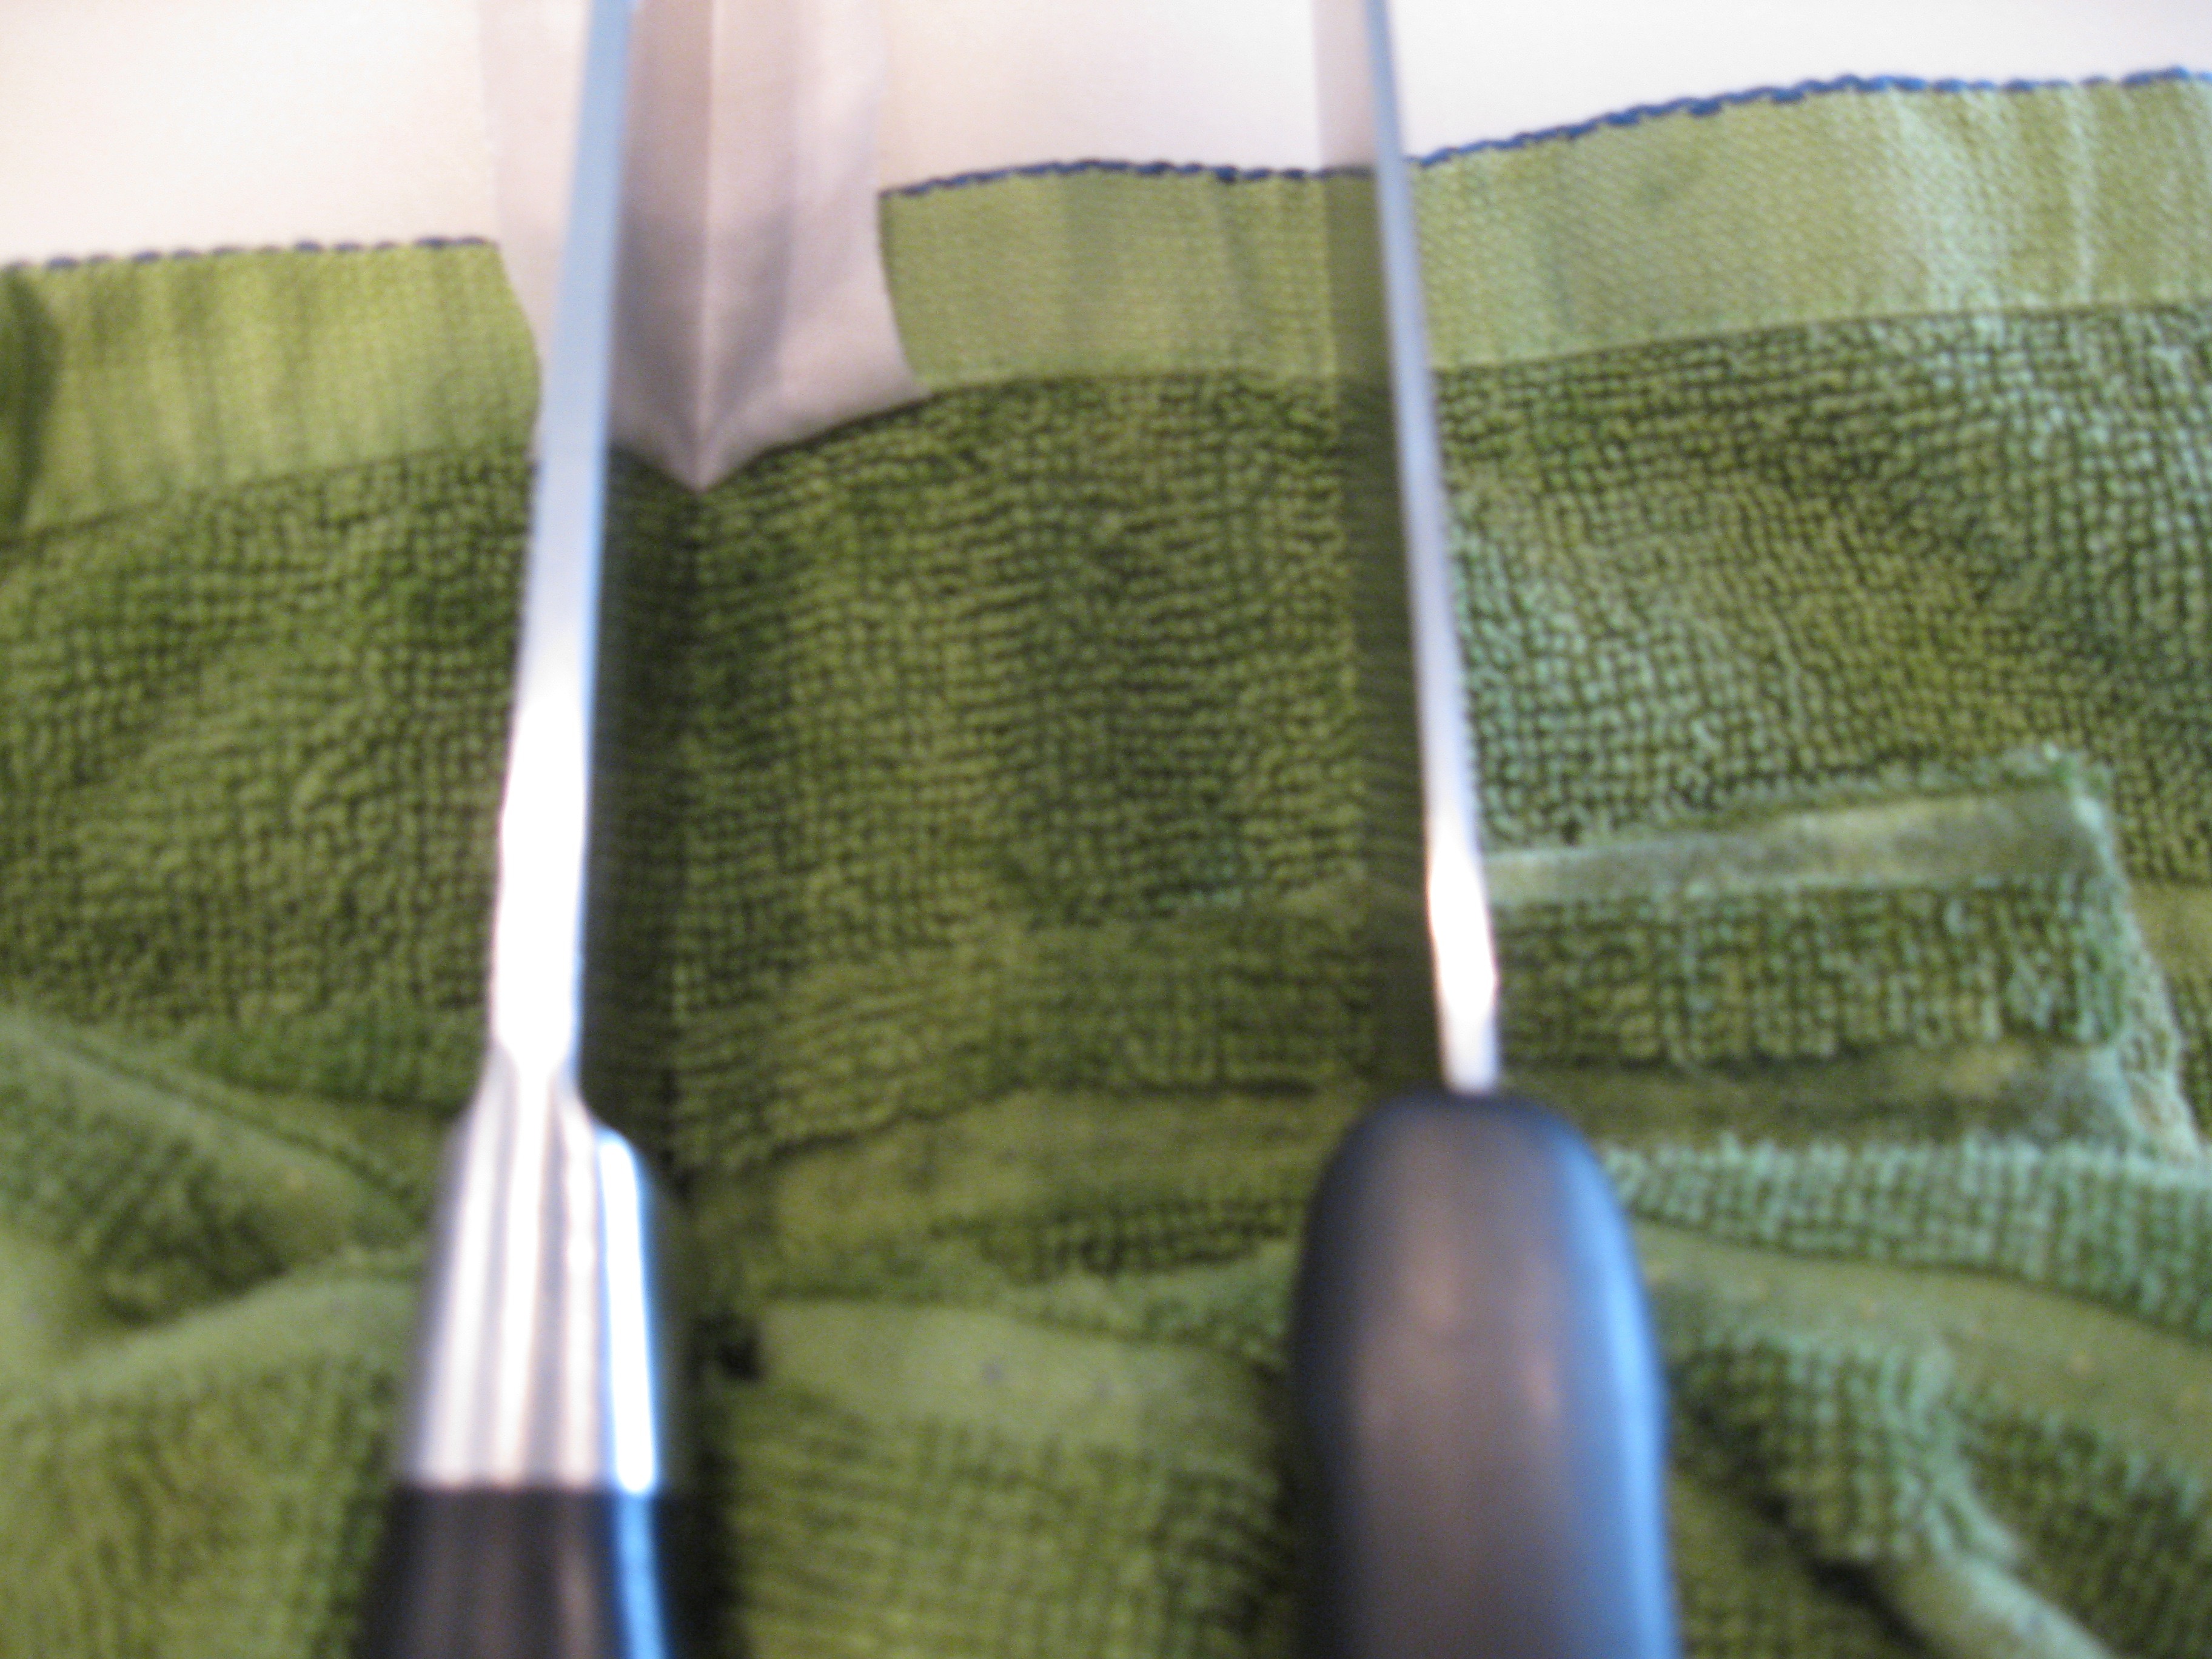
Henckels knife on the left, Martha Stewart knife on the right. Note the difference in the thickness of the blades.
You’ll see here that the Henckels knife has a narrower bolster, but it’s nice, rounded, and smooth, and leads right into the blade, as it’s actually part of it. The Martha knife also has a nice solid bolster. You’ll notice that the edge of the blade sits a little below the bolster on the Martha knife, so there is a point there where it can rub against your hand.
The other thing I want you to look at is the width of the blades. The Henckels blade is much wider along the spine, and the Martha blade is much narrower. I will not say that one or the other of these is better, necessarily, but they do make a distinct difference in how the knife handles. You can get nice thin slices from the narrower blade, with the distinct downside that it’s much more painful on your index finger if you hold the knife properly. The thicker blade tends to have cuts stick to it a little more, and it’s a little harder to get a really nice thin cut, but it’s much more comfortable to use.
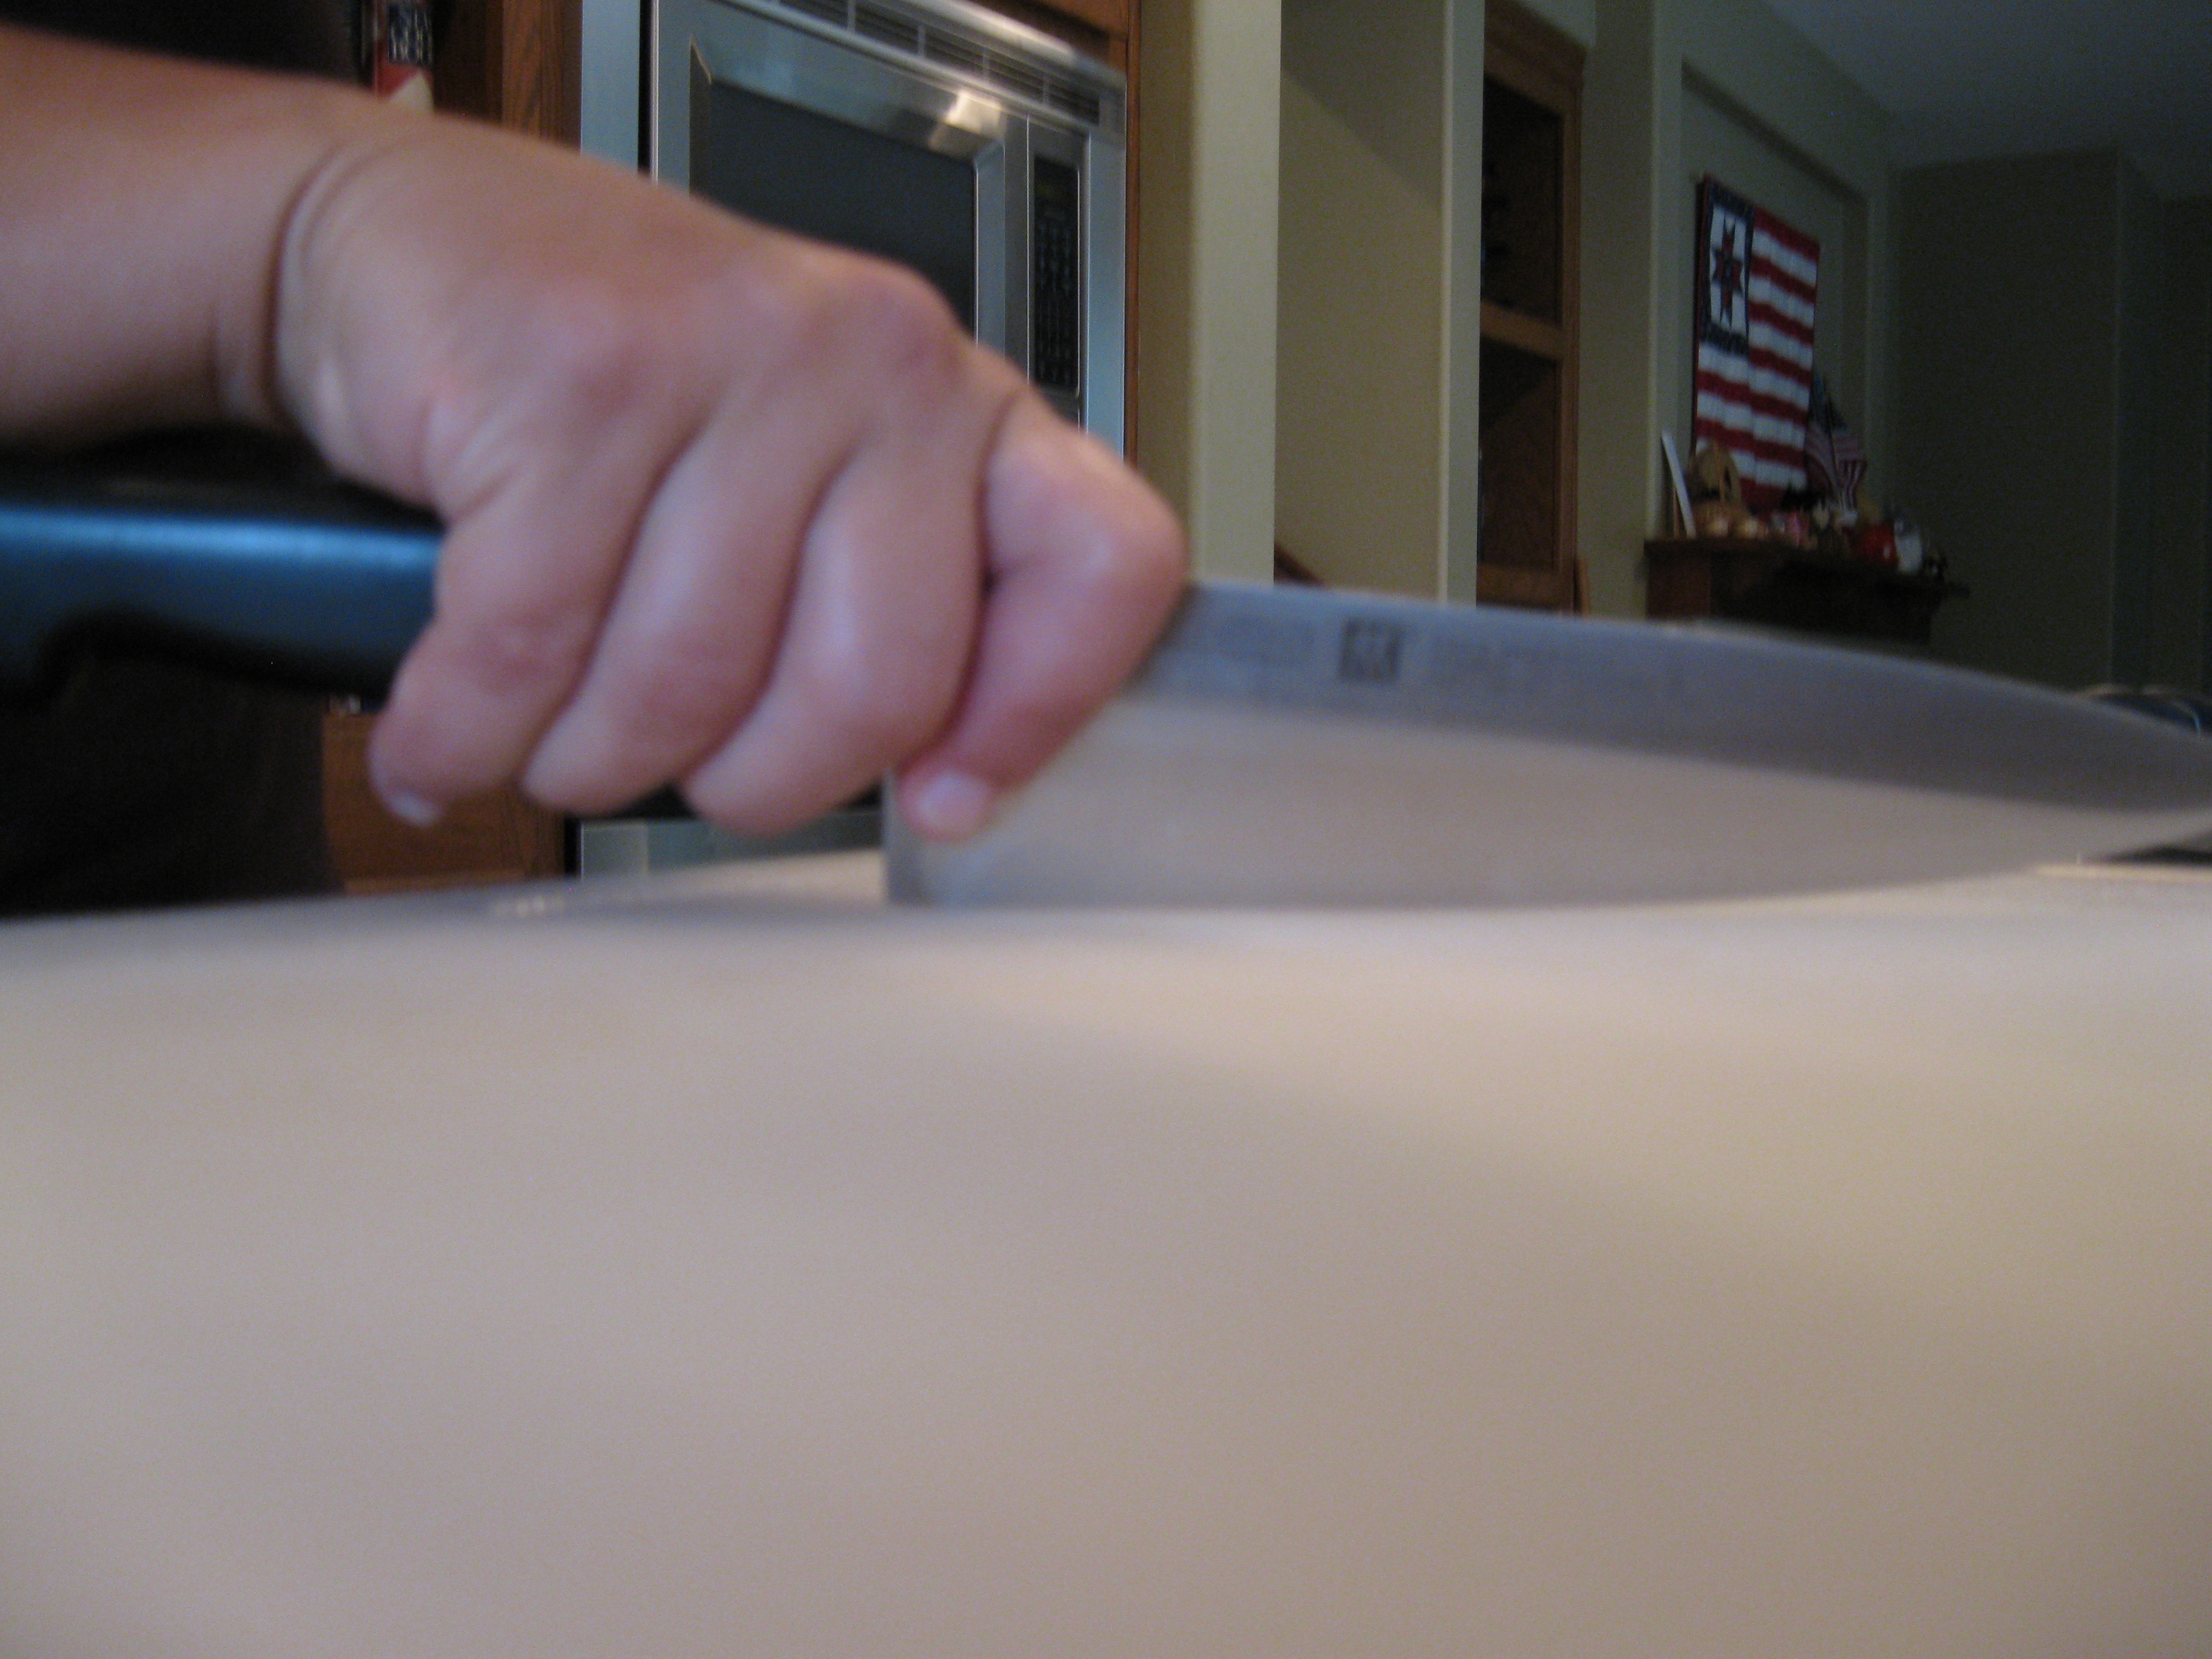
Now a bunch of you are probably looking at me going, “What do you mean, hold the knife properly?” How many of you out there hold a knife like a hammer? Right. So this is the thing that going to culinary school was worth it for. I’m going to tell and show you, so that you don’t have to go to culinary school for this.
Below is an incorrect grip.
Hammer grip. Don’t do this!
Most people hold their knives this way. It’s inefficient and doesn’t take advantage of the lever provided by the bolster. Your hands will hurt, the blade will slip around, it will take forever to chop things, and you’ll wonder why you hate cooking. Don’t make things harder for yourself than they should be.
Pinch the blade like this.
Your index finger should be on the spine of the knife, with the bolster under the base of that finger. No, you will not cut yourself, I promise.
This simple change in how you hold the knife will give you a lot more leverage and make your blade a lot less floppy. Don’t believe me? Hold a knife one way and let a friend waggle the tip of the blade in a side-to-side motion. Then switch to the other way. You’ll feel the difference in how well you can hang on and control the knife.
Now, about comfort. Your index finger will be sitting on top of the blade. Do that enough and you’ll feel it. Every professional chef has a callus on that finger from where the knife sits. I do too. If you do this with a skinny-spined blade, you’ll feel it a lot more. A thicker spine is substantially more comfortable.
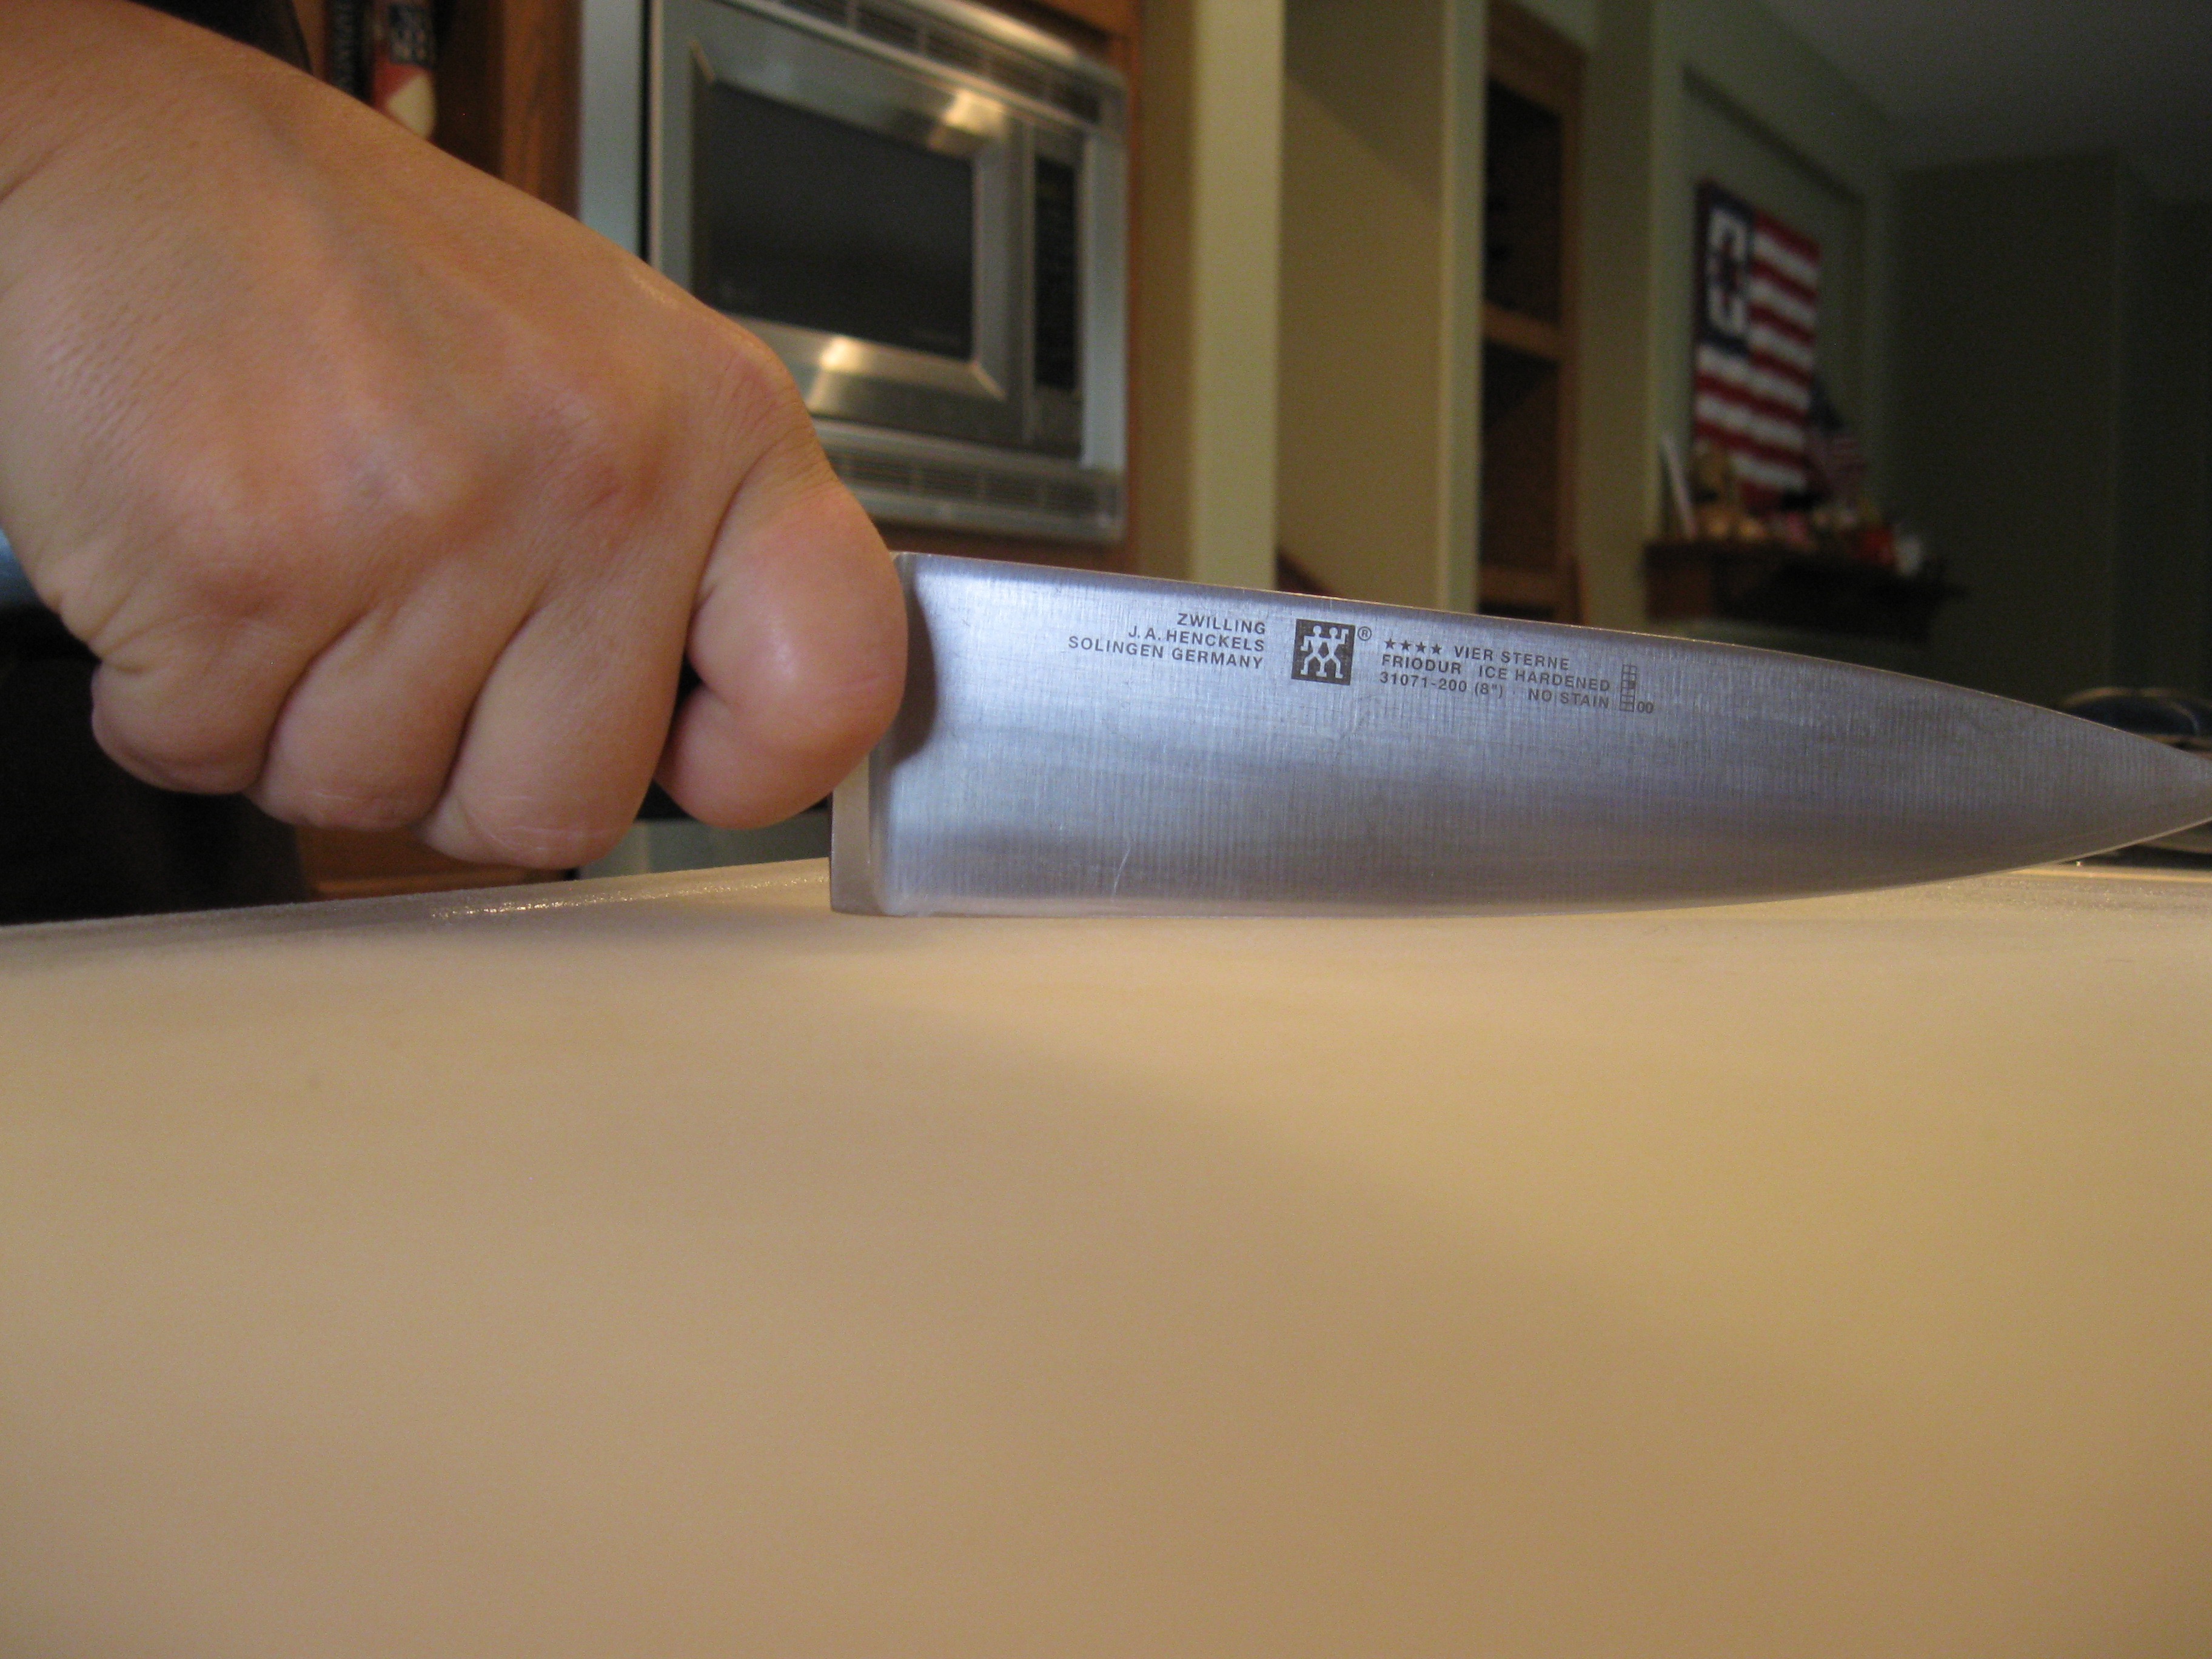
No matter what kind of knife you choose, a dull knife is both dangerous and no fun to work with. You need a lot more pressure to use a dull knife, and the tendency for them to slip is much higher. Keep your knives sharp using a honing steel. You don’t need anything fancy. A plain steel like this one is fine.
Your steel should be longer than your knife.
I’ll talk more about honing and sharpening another day, but for what it’s worth, unless you regularly slice bread, the tools pictured above are the only knives or blades you need in your kitchen: a quality chef’s knife, a quality paring knife (that one’s a Gerber that I found at a thrift store and love to pieces), a pair of shears and a honing steel. If you do more with bread, get a nice long serrated knife too, and you’re pretty much set.
No Comments Yet